Google Meet
Google Meet is the easiest way to give your lecture online.
![]() Google Meet is been available for all 1Hope Accounts. It allows you to host online video conference
calls with up to 500 participants, right in the web browser.
Google Meet is been available for all 1Hope Accounts. It allows you to host online video conference
calls with up to 500 participants, right in the web browser.
Watch a video walkthrough of Google Meet
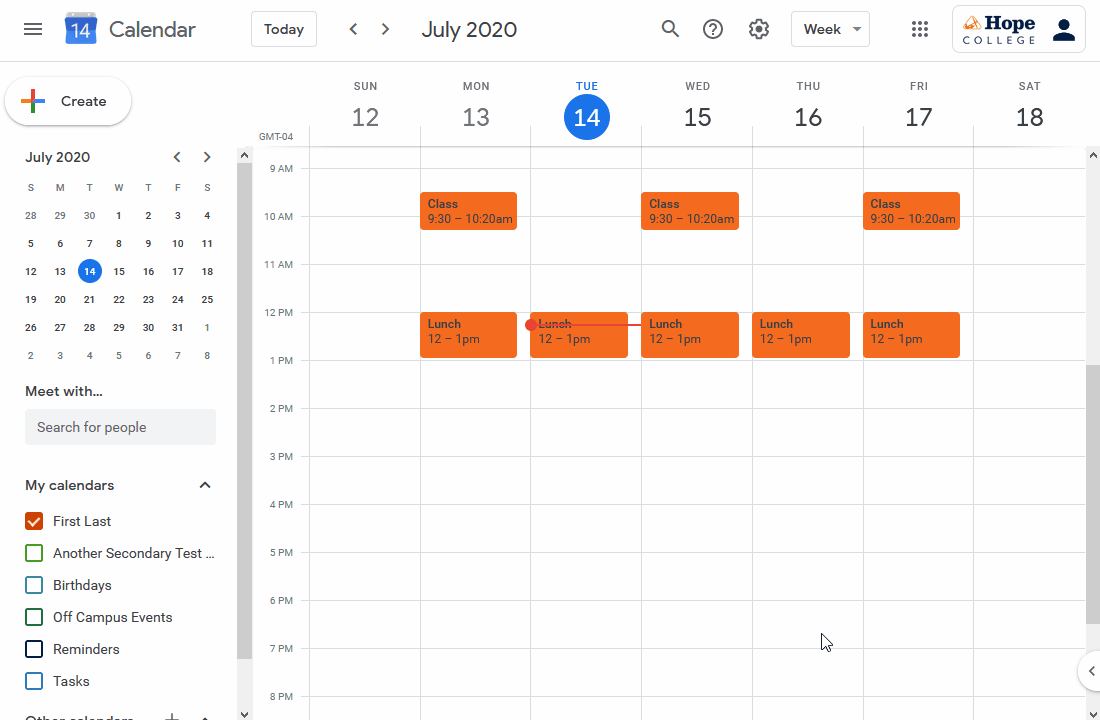
Scheduling a Call
To get started, create a new ![]() Google Calendar event and invite all of your participants as guests. As soon as you do, a new Google
Meet call will be created with a unique URL for your participants to use. The person
who scheduled the event will be the only one in the call with the ability to mute
or kick other participants.
Google Calendar event and invite all of your participants as guests. As soon as you do, a new Google
Meet call will be created with a unique URL for your participants to use. The person
who scheduled the event will be the only one in the call with the ability to mute
or kick other participants.
You may also want to consider setting up this event as a recurring meeting. If you have the event Repeat, the link to the attached Google Meet call will remain the same across instances of the event.
When it is time for your call, all that the participants need to do is click that link. There is nothing to download/install and no accounts to create.
Documentation about how to join a scheduled Google Meet is available to distribute to participants
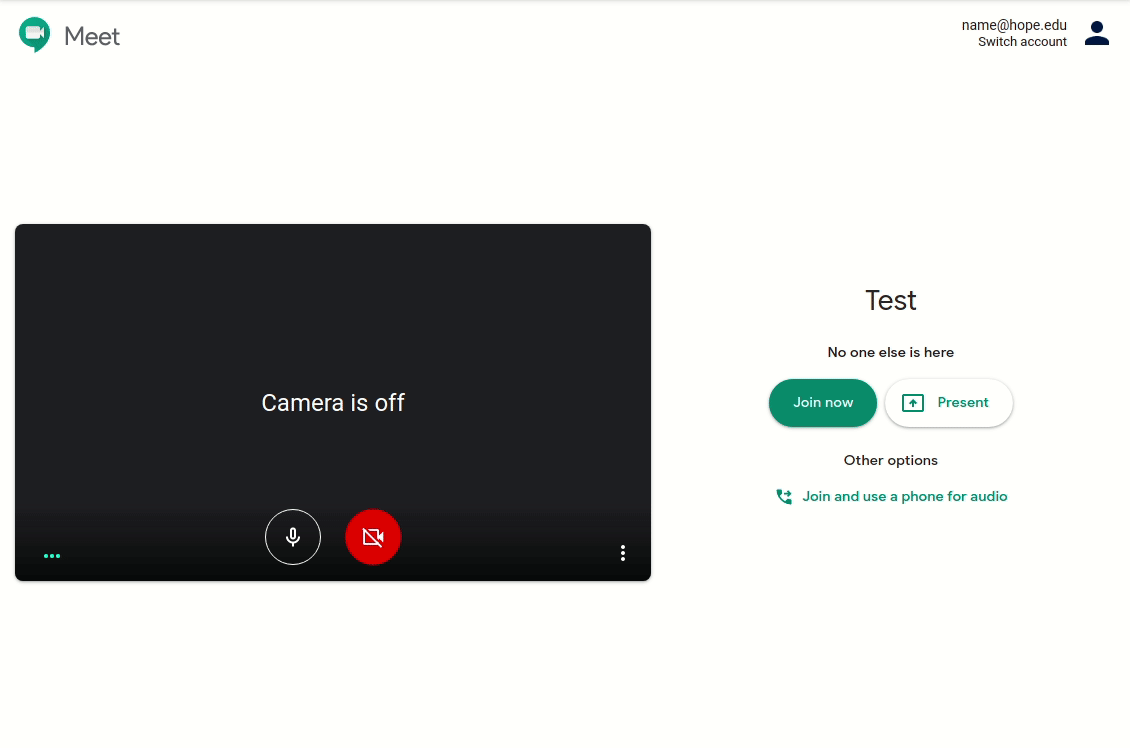
During the Call
When participants click on the link, they will land on a lobby screen where they can check their microphone and camera before joining the call. Keep in mind good conference call etiquette and consider muting yourself before entering the call. Once you click Join now, you're in the call!
Depending on the number of people in the call, the layout will automatically switch between:
- Tiled:
16 (adjustable up to 49) equal-sized participants at once - Spotlight:
The presentation, active speaker, or pinned video front and center - Sidebar:
The presentation or active speaker with additional participants along the side
See the Google Meet help article on layouts for more information.
Note: If you previously installed a third-party extension to see more people at a
time in Grid View, we recommend removing it
Bottom Bar
In the bottom left, you will see a clock and the name of the meeting. Next to that:
- Mute or unmute your microphone
- Turn your video on or off
- Turn captions on or off, just for you
- Raise your hand to indicate that you'd like to speak
- Share your screen
- Your entire screen:
This will show anything that's on your screen to everyone in the call, as you do it, in real-time. - A window:
Even if other windows are open on top of the shared window, everyone in the call will only see the one application you pick. This may be useful if you want to have slide notes open as well, or if you want to begin sharing content but then switch back to the call. - A Chrome tab:
You can share A Chrome tab to the call for high-quality audio and video sharing. This is the only option that will share audio to the call, so if you're sharing media, choose this option. Make sure you mute your microphone or turn down your volume while playing media, so that people don't hear it twice!
- Your entire screen:
- See more options, such as to Record the Meeting or add a Virtual Background
- Leave the call
- See information about the call, such as the name of the call, calendar event information (if scheduled via Google Calendar), joining information, and more
- See and manage everybody in the call
- View and send chat messages
- Start an activity, such as Breakout Rooms, Polls, Q&A, or
 Jamboard collaborative whiteboard
 - See host controls. If you created the meeting, you can change settings such as who is allowed into the call or who can share their screen.
Recording
Faculty, Staff, and Student 1Hope acccounts have the ablity to record in Google Meet.
When you begin recording in the Activities or More Options menu, everyone in the meeting is alerted that the meeting is now being
recorded. Press it again (or end the call) to stop recording. When complete, a video
file will be added to the meeting organizer's ![]() Google Drive in a folder called Meet Recordings. More information is available in the Google Meet Help center.
Google Drive in a folder called Meet Recordings. More information is available in the Google Meet Help center.
When recording a Meet with no other participants (to record yourself/your class), you must start the call and then UNcheck a setting otherwise it'll end the call thinking it's an error. Click the ⋮ three-dots menu → Settings → General, and uncheck "Leave empty calls"
CIT COMMUNICATION
Communication from CIT will always be signed by an employee's name. CIT will never ask for your password to keep your account active or to increase your email storage space.
HOURS
CIT is open Monday–Friday,
8 a.m.–5 p.m.
Durfee Hall110 East 10th StreetHolland, MI 49423
workP. 616.395.7670
cit@hope.edu